
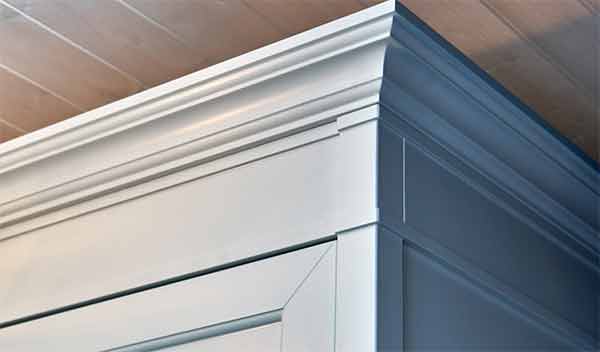
Crown Molding has been one of the best techniques that have been used for centuries when it comes to disguising and beautifying the Juncture of the Ceiling and walls. This is one of the techniques that do require you to have not only the skills but also a wide experience hence the beginners in the woodwork are less conversant with it.
Despite that if you are a beginner in woodwork techniques then having this technique plays an imperative role in helping you to save a lot. Crown Molding with the best Coping Saw is deemed to be one of the easiest tasks that you can perform.
It involves the creation of the Cornice’s curves that at times they are given classical names such as SCOTIA, Cyma, and Ovolo. You have to make a variety of saw cuts such as the coped Joint and the Outside Miter when installing the Crowns. Coping is the process referred when one cuts the end of a molding to mimic the profile milled into its face. The Coped Cuts are the one essential during the crown molding process into the inside corner.
Table of Contents
Steps to Follow when Crown Molding With a Coping Saw
Requirements During Crown Molding
- Pencil.
- Coping Saw
- Miter Saw.
- Tape Measure or Any Other Measurement Tools.
- Wood or Lumber.
Procedure and Steps
Step 1: Crown Installation.
- This is where you will have to determine the amount of Crown that you will have to buy.
- You will also take measurements of each wall and make a sketch that is plain of the room.
- The pieces with a square cut on each end be the first piece that you will have to install. These ends are usually coped with a coping saw. You can also Miter them using the miter saw.
Step 2: Laying Out of The Molding
This is where you determine how each piece of the molding will go up around the room. You will make a drawing of the plan of the room on a piece of paper. When determining the layout, you will have to install the Outside corners last so as to avoid coping both ends of the last length of the molds. You will then mark the position of both ends using the pencil. You will then locate the Studs and Joist and mark their locations with a pencil.
Step 3: Installation of the First Length
You will make the measurements of the Crown Moldings then transfer the measurements to the wood. Using a power miter saw you would cut the molding square at each end. You will then install each length of the Mold in the walls.
Step 4: Cut The Inside Joints
For you to cut the inside Joints, you need a Coping Saw, and the Process of Cutting these ends of the molding is called the Coping Process. You will place the length of the crown upside down on the coping Saw so that the bottom of the mold sits on the wall.
Setting the Coping Saw at 45 Degrees you will swing the saw left for the left side so as to Cope with the Corner. You will do the opposite when dealing with the right Corner. Always ensure that the long Point of the Miter is on the back of the Molding and not on the face.
Step 5: Using a Pencil Highlight the Cut Line
After you have Copied the end of the Crown Molding with a Coping Saw you would mark the edge of the face if the Coped Cut using a pencil. This will be used as your Coping Saw Cut Line.
Step 6: Cope the Inside Corner Joint
You will create a snug-fitting Joint by holding your Coping Saw at 5 Degree away from the face of the molding. You will cut along the pencil marked of your edge. Bring the Molding to the wall and slide it into place so as to check for the tight fit.
You will determine of the uncut ends will land in the inside or outside corner before you can attach your piece to the wall. Using a miter saw you would make a square cut on the mark you had created and the nail your molding up.
Step 7: Mockup An Outside Corner
Take the Measurements of the Coped Piec of the Molding that ends at an Outside Corner and creates a mock-up of the corner from the 12-inch molding Scraps. You will then make an outside miter cut on one piece. Lastly, you will glue and nail the pieces together.
Step 8: Install the Outside Corner
You will butt the side of the Corner into an inside corner. If the corners do not have a butt, then you will make a cut by ensuring that your blade rotates at the opposite 45-degree angle. You will align the Pieces together and glue them
Step 9: Cutting and Fastening a Return
You will Continue coping the inside Corners as you miter the Outside Corners and assemble your Molding to the wall.
In Conclusion
Crown Molding Can be done effectively as long as you have the right tools. The two essential tools that you should not miss out on when crown Molding is a Coping Saw and Mitering Saw. They are essential when you are Crown Molding.
When you are Crown Molding, you are always bound to make a lot of mistakes especially if you are a beginner in the woodwork project. Despite that having a thorough practice on the crown Molding Techniques enables you to increase your efficiency.