A router table is a fixed woodworking machine in which a vertically slanting spindle of a woodworking router obtrudes from the machine table and can be spun between the speeds of 3000 and 24,000 rpm. Cutter heads or router bits can be mounted into the spindle chuck.
It is important to know how to use a router table because it helps enhance the versatility of a handheld router. How you use a router table depends on your application and your workplace.
For instance, very large workplaces may not support a router table, and thus they must be routed with a handheld machine. On the other hand, small workplaces may not support a handheld router and you would need a router table.
Table of Contents
How to Use a Router Table
Router tables are easy to use. Here is a step by step guide on how to use a router table.
Benefits of a Router Table
Speed and Accuracy
One of the benefits of using a router table is its high precision. Many people would argue that how fast you use a machine depends on how knowledgeable you are at using it.
As much as this is true, the cutting bit of the router table is fixed and thus allows the wood to pass on its own without the need to be moved in any particular direction as opposed to using a handheld router.
The precision of a table router allows the user to apply pressure on wood in scenarios where the vibration of the machine may cause the piece of wood to shake or slide on the table.
If you used the same amount of pressure on a handheld router, it would be knocked off resulting in an irregular, poor cut.
As a user, you need not worry about the router going off because you can move the wood at a fast pace without risking a distorted cut. In the long run, this improves your output substantially.
Works Best For Complex Patterns
Handheld routers are generally used to cut in geometric patterns or straight lines. This means that if you are looking to cut wood into complex designs or patterns, a fixed router is what would work for you. It is, therefore, important to know how to use a table router.
With a table router, you can maneuver a piece of wood without necessarily adjusting the router. Most router tables come with pin slots which act as router markers for the wood.
You can, however, attach particular pins and pieces of wood to customize the router table surface depending on the shape of the pieces of wood you are using as you learn how to use a router table.
Easy To Get Excellent Depth Cut
If you are experienced and know how to use a router table, it is the best when it comes to getting accurate depths, especially in complex situations. A router table has a fixed, accessible bit assembly that allows for rapid modification.
This means that you can choose and modify the depth of a cut easily even if you have to do multiple depth cuts.
A handheld router, on the other hand, works best for simple cuts and it requires being fully experienced to use it.
Safety And Maintenance Is Enhanced
Maintaining a router table is very simple; no sawdust gets into the niches instead it is left on the table. A very small portion of the sawdust moves under the table and gets onto the router.
You can simply vacuum the bit assembly by removing the bit from the table to clean the sawdust off the router. It is easy to remove and reattach the router which makes its maintenance very simple.
How To Use A Router Table- Explained In Easy Step
Using a router table is very easy. To use it in the most efficient and safest way, it is critical to follow these steps:
STEP 1: SWITCH
It is important to ensure that your switch actually works. It makes it easy to switch the router on and off without having to go below the table.
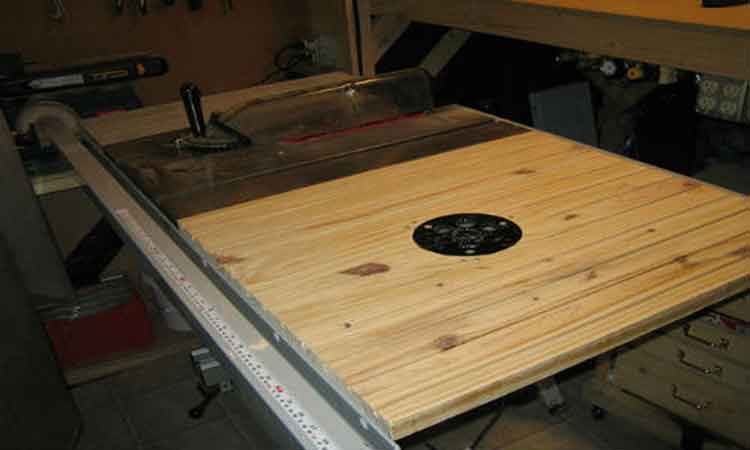
STEP 2: INSERT PLATE
As you set up the router table, pay close attention to the insert plate. The router base is attached to the insert plate. As you attach it make sure that it sits tightly to the surface of the table.
It is easy to attach or remove the plate which makes it easy to adjust heights and change bits. You can use a router lift if you prefer.
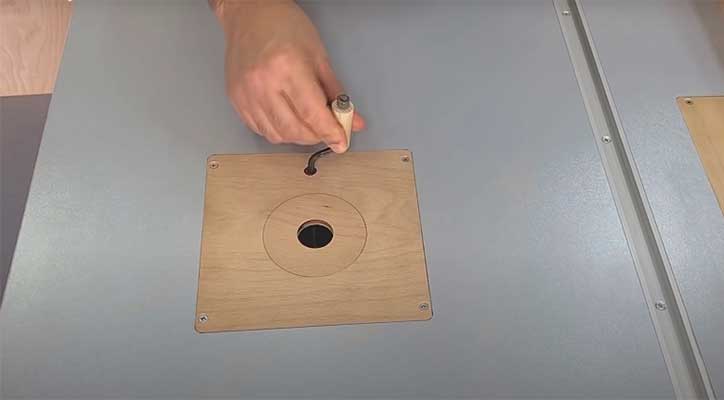
STEP 3: RING
Most insert plates come along with reducer rings. A reducer ring helps you in selecting a ring that matches the diameter of the router. This helps reduce chances of chip outs and also ensures the pieces of wood being cut don’t tipple down around the opening of the router bit.
STEP 4: FENCE
The fence of a router table determines the accuracy level that will be achieved. It guides the piece of wood in the right manner in order for it to get to the router bit as needed.
This also enhances safety since you are able to insert feather boards, bit guards as well as other accessories onto the router table. The fence also has a dust collection.
The Most Common Router Table Mistakes
Power Issues
In some cases, you may switch on the power tool but it may fail to turn on. This is a common problem that can be quite upsetting. The first thing you need to do is to confirm that your router is plugged in. you may also check the fuses or circuit breakers to see if there is any problem there.
You probably might have to replace the fuse. If this does not work, the machine might have malfunctioned or maybe it is just an electrical problem which will require you to call an electrician or a repairman.
Slipping Bit
A slipping bit occurs when the bit moves around inside the chuck and as the chuck turns; it slips around and does not move into the wood. To solve this, you can tighten the chuck around the bit for it to fit tightly. However, if the chuck is stripped, you cannot tighten it and you will definitely need to buy a chuck for the router table.
Bit Depth
Woodwork projects require the router table & the bit to be set at specific heights. A change in the height may lead to errors due to an accumulation of sawdust which can make the bit move upwards. Use a screwdriver to get rid of the sawdust after which you may use compressed air to eliminate any sawdust on the table.
A Stalling Bit
When your bit has loose belts or it is worn out, you can experience inconsistent bit speed. Cut off all power supply to the router table and open it to assess the belts. Look out for belts that might be cracked or those that are worn out.
If the belts are worn out, you need to replace them. However, if they seem okay, ensure that they are tightly connected and properly set on the drive wheels.
Getting Too Small A Table
One common problem as you learn how to use a router table is getting a router table that is too small. You will outgrow a table that is too small in no time. It may be cheaper and even save on space, but it will cost you more in the long run.
Invest in a table that meets the industry standards; a table that will enable you to make use of accessories that include miter gauges, fences, dust collectors among others.
Useful Router Table Tips for you
Here are some useful tips for you that can make your router table experience worthwhile.
USEFUL TIPS
- Ensure that your ears and eyes are always protected.
- Push blocks position your hand at a safe distance away from the bit.
- Bits with a large diameter work best with a router table.
- Light cuts always work well.
- Using a feather board to support the workpiece against the fence or router table works well for you.
- It is important to use a guard; you can devise your own or purchase on if the fence did not come with one.
- Always make sure that the motor is secured before you start the router.
- Do not overload the router or force the bit
Conclusion
Knowing how to use a router table is important because it is an important woodwork machine, whether you are a professional or an amateur. It helps you handle certain tasks that would almost impossible to accomplish with a handheld router.
It is always important that you prepare properly for your operation. The router table is easy to mount and adjust make it a very easy machine to use.